---
title: Ascaso Steel DUO Plus - Steam Lever Adjustment
description: Ascaso Home troubleshooting guide for tightening a loose joystick steam valve assembly.
---
[Skip to content](https://support.ascaso-usa.com/ascaso-steel-duo-plus-steam-lever-adjustment#main-content)
English
Show submenu for translations
[](https://ascaso-usa.com/)
Open main navigation
Close main navigation
- English
Show submenu for translations
- [Contact us](https://ascaso-usa.com/pages/contact-us)
[Contact us](https://ascaso-usa.com/pages/contact-us)
Search here for related support articles
- There are no suggestions because the search field is empty.
1. [Ascaso USA Support](https://support.ascaso-usa.com/?hsLang=en)
2. [Troubleshooting](https://support.ascaso-usa.com/troubleshooting?hsLang=en)
3. [DUO/DUO Plus](https://support.ascaso-usa.com/troubleshooting?hsLang=en#duo-duo-plus)
# Ascaso Steel DUO Plus - Steam Lever Adjustment
## Process for adjusting steam lever mounting tension for a steam valve assembly that isn't open/closing as it should.
Tools needed:
1\. Sharpie marking pen
2\. flat head screw driver
3\. 2.5mm allen wrench
4\. 1.5mm allen wrench
5\. small pliers or wrench to move the valve position
6\. screw grabbing tool if one is handy
**Step 1 **: Power the machine off, unplug the machine from the power source, and allow it to cool completely. Use a 2.5mm metric allen wrench to unscrew the top 2 screws on the back panel which will allow the top panel to be removed, and set this to the side.
**Step 2** : Remove the steam handle with the flat head screw driver and note the orientation of the inner mounting point for later re-assembly.
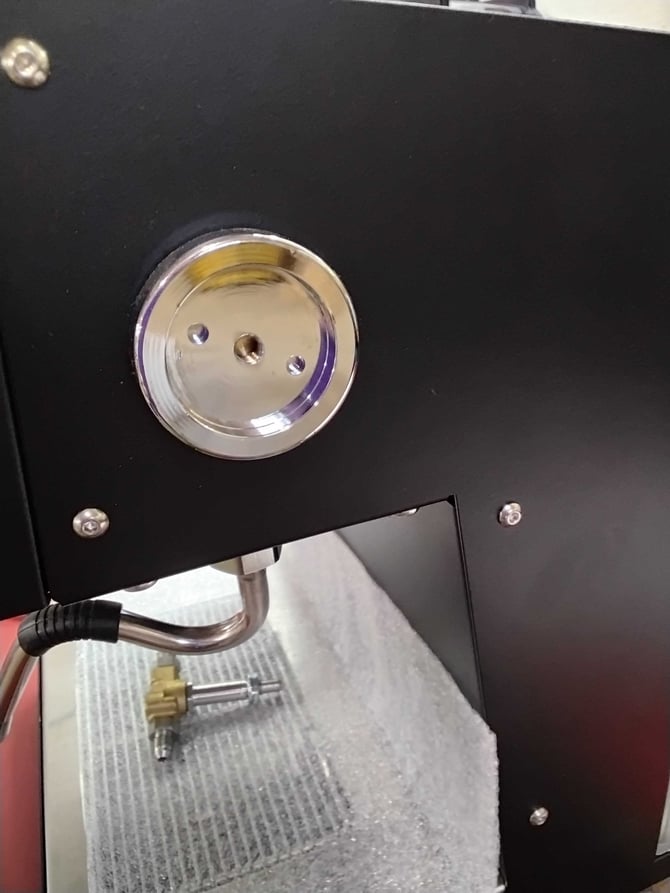
**Step 3** : The 2.5mm allen wrench will be used to remove the longer screw that sets the throw for the steam handle. This will likely be loctite in place so use caution and do not force it if it stops. (We can help witha replacement if it gets stripped out) Rotate the steam handle toward the front of the machine to access the grub screw, 1.5mm wrench. Make sure the grub screw is pointed upward, this is where screw grabbers or a pair of long needle nose pliers will be helpful because this drops quite easily.
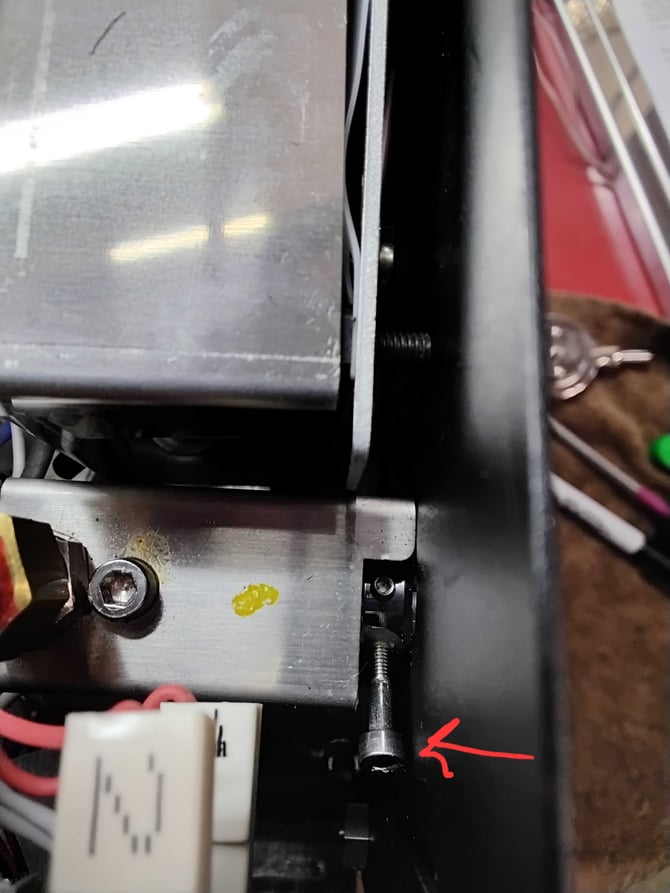**Step 4** : Mark the place of one of the screws that just came out. We tend to find it most helpful to mark the throw since that is now where the grub screw needs to go, but whatever works for you so it is easiest to remember re-assembly placements. Using the pliers rotate the brass towards the back of the machine, stopping when the marked spot is now 1 place behind where it was.
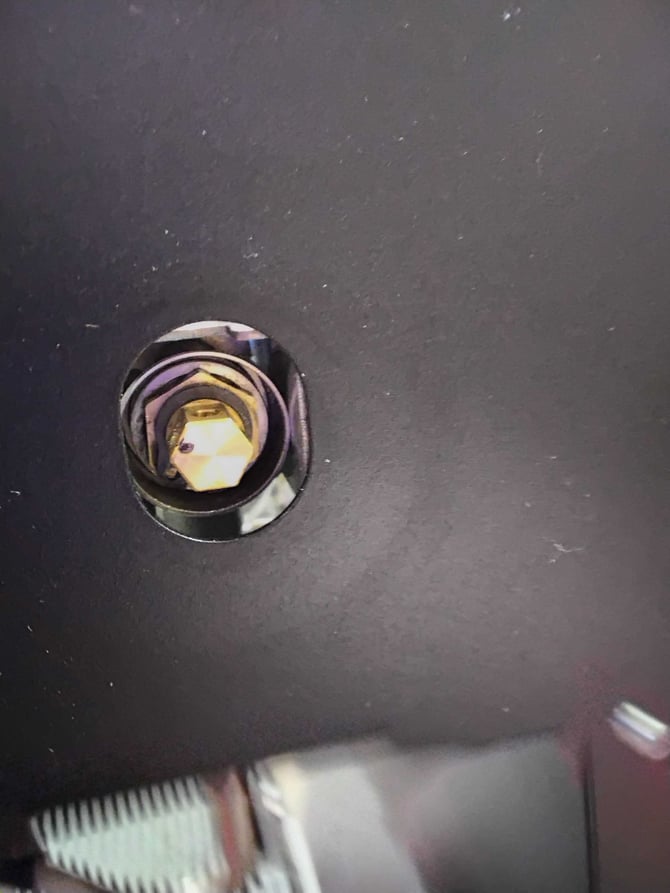
**Step 5 : **Place the steam handle mounting bezel back over the brass and place the small grub screw. Once in place rotate it further backwards to access and replace that longer throw screw. Reattach the steam handle and verify proper throw on the handle.
**\*\*Please note: This may need to rotate back 2 places. Start with adjusting 1 place and test; if further adjustment is needed the process can be repeated again adjusting one more position back.\*\***
- [Getting started](https://support.ascaso-usa.com/getting-started?hsLang=en#main-content)
- [Barista T](https://support.ascaso-usa.com/getting-started?hsLang=en#barista-t)
- [DUO/DUO PLUS](https://support.ascaso-usa.com/getting-started?hsLang=en#duo-duo-plus)
- [All Ascaso Home Machines](https://support.ascaso-usa.com/getting-started?hsLang=en#all-ascaso-home-machines)
- [Troubleshooting](https://support.ascaso-usa.com/troubleshooting?hsLang=en#main-content)
- [DUO/DUO Plus](https://support.ascaso-usa.com/troubleshooting?hsLang=en#duo-duo-plus)
- [Ascaso Home Machines](https://support.ascaso-usa.com/troubleshooting?hsLang=en#ascaso-home-machines)
- [Baby T Plus](https://support.ascaso-usa.com/troubleshooting?hsLang=en#baby-t-plus)
- [Technical Revision Updates](https://support.ascaso-usa.com/technical-revision-updates?hsLang=en#main-content)
- [Ascaso Home Equipment](https://support.ascaso-usa.com/technical-revision-updates?hsLang=en#ascaso-home-equipment)
- [FAQs](https://support.ascaso-usa.com/faqs?hsLang=en#main-content)
- [Ascaso Home Machines](https://support.ascaso-usa.com/faqs?hsLang=en#ascaso-home-machines)
- [Support](https://support.ascaso-usa.com/support?hsLang=en#main-content)
- [Packaging / Accessories / Etc](https://support.ascaso-usa.com/support?hsLang=en#packaging-accessories-etc)
- [Barista T](https://support.ascaso-usa.com/support?hsLang=en#barista-t)
- [Technical Documentation](https://support.ascaso-usa.com/support?hsLang=en#technical-documentation)
- [Ascaso Home Repair Technicians](https://support.ascaso-usa.com/support?hsLang=en#ascaso-home-repair-technicians)
- [Ascaso Warranty](https://support.ascaso-usa.com/support?hsLang=en#ascaso-warranty)
- [Ascaso USA Return Policy](https://support.ascaso-usa.com/support?hsLang=en#ascaso-usa-return-policy)
- [Ascaso USA Shipping Policy](https://support.ascaso-usa.com/support?hsLang=en#ascaso-usa-shipping-policy)
- [Part Diagrams](https://support.ascaso-usa.com/support?hsLang=en#part-diagrams)
[](https://ascaso-usa.com/)
[mailto:Info@AscasoUSA.com](mailto:Info@AscasoUSA.com)
Copyright © 2026, Ascaso USA